Rosie loves to discover everything. From a great deal to a new recipe. Hope you like discovering things with her.
Showing posts with label baking. Show all posts
Wednesday, October 30, 2013
Spiked Dutch Apple Pie Minis
Did you notice that we like apples? Apples are a go to fruit in our family. There are banana allergies. Plus the usual gamut of dislikes towards certain fruits. Apples are generally the beloved fruit to all of us. Up there with peaches and nectarines which is an entirely different discussion.
So, yet again we have an apple recipe. One that takes out some of the work of Apple Pie. Or at least the work of eating it. You may eat them with a fork as we did when they were warm, but when cool they held up just fine. An apple pie you can eat on the go, as long as you are not waving it about upside down. There's only so much anti-gravity powers that a gelled apple mixture can contain in one bite.
This isn't your average apple pie. We boosted the flavor with some Spicebox Whisky. There is a vodka in the crust to make it flaky, but that alcohol will bake out. The whisky in the apples is there to stay. You will not be sorry as the extra vanilla makes this treat extra sweet. Truly, this pie is a milder more adult version. Don't count on a cinnamon or lemon zing but a succulent vanilla swirl.
Spiked Dutch Apple Pie Minis
Apple Pie Filling
3 Rome apples, peeled, cored and diced
3 MacIntire appes, peeled, cored and diced
5 tablespoons sugar
1/4 teaspoon cinnamon
pinch of nutmeg
2 teaspoons cornstarch
2 tablespoons lemon juice
2 ounces Spicebox Whisky
Dough
1 cup flour
1/2 teaspoon salt
1/3 cup shortening
3-4 tablespoons ice cold vodka
Dutch Crumb Topping
1/2 cup flour
3 tablespoons sugar
4 tablespoons unsalted butter, softened
Make the dutch crumb topping first. In a small bowl, combine flour and sugar. Using a pastry cutter, two forks or your fingers work butter into flour until the mixture resembles coarse meal. Set aside.
In a large skillet combine the apples, sugar, cinnamon and nutmeg. Cook over medium heat, stirring occasionally for 5-7 minutes, until apples are tender but firm. In a small cup, whisk together cornstarch and lemon juice. Add to apple mixture along with whisky and continue cooking until mixture thickens. Remove from heat and allow mixture to cool.
While the apple mixture cools, work on the crust. In a medium bowl, add flour and salt whisking to combine. Using a pastry cutter, 2 forks or your fingers work shortening into flour mixture until it resembles coarse sand. Add 3-4 tablespoons cold vodka and work mixture into a pie dough. Roll out dough and cut into 5-inch circles. By re-rolling the scraps you should be able to get 10 circles of dough. Carefully set dough circles into a muffin pan, making sure to line bottoms and sides of cups with dough.
Preheat oven to 350 degrees. Completely fill dough lined muffin cups with apples. Sprinkle dutch crumb topping over apples. Bake 20-25 minutes or until bubbly and crust is golden. Let rest 5 minutes and serve warm.
Tuesday, October 15, 2013
Fresh Apple Galette
It's finally FALL y'all! I am so excited it's here. I've been waiting all summer long for it to get here. Don't get me wrong, I like summer too. But fall means fresh apples! I love apples almost as much as I love strawberries and my love of strawberries is legendary!
I like the super tart baking apples the best. Romes, Granny Smith, MacIntires to name a few. They're crisp and just have that tart bite that reminds me of sweet tarts. One of my absolute favorite candies growing up. Even though I don't make it apple picking every year, I still make lots of apple things.
This is the first of those recipes. A fresh apple galette. What is a galette, you might ask? Its like a free-form open faced pie. I think galettes are easier to make than a pie. They aren't meant to look perfect and taste the same. A perfect dessert for a busy family.
Fresh Apple Galette
2 Rome apples, cored peeled and thinly sliced
2 MacIntosh apples, cored peeled and thinly sliced
1/4 cup light brown sugar, packed
1/4 teaspoon cinnamon
pinch of nutmeg
2 teaspoons cornstarch
1 tablespoon lemon juice
1 egg yolk beaten with 2 tablespoons water
sugar to sprinkle
Dough Recipe
1 cup flour
1/3 cup shortening
1/2 teaspoon salt
3-4 tablespoons ice cold water
In a large heavy bottomed saute pan combine apples, brown sugar, cinnamon and nutmeg. Cook over medium low heat about 5-6 minutes, until juicy but still crisp. In a small bowl, whisk together cornstarch with lemon juice. Slowly whisk into apples. Cook about a minute until juices thicken. Remove from heat and let cool slightly.
Meanwhile combine flour and salt in a medium bowl, whisking to combine. Use a pastry cutter, two forks or your fingers to work shortening into flour until mixture resembles coarse meal. Sprinkle with 3 tablespoons of water and work into dough, adding more water until dough just comes together.
Form dough into a round disk, place on floured countertop and roll into a rough 12 inch circle. Move to parchment paper lined baking sheet. Mound apples into center of dough, spreading slightly. Going round in a circle fold dough towards center overlapping slightly.
Brush entire galette with egg wash, sprinkle with sugar. Bake 350 degrees for 20-25 minutes until golden and bubbly. Remove from oven, cool slightly and serve.
Wednesday, August 29, 2012
Wholesome Wednesday: Maple Coconut Rolls
A couple of weeks ago, I went to an estate sale in Barrington that we waited forever (and I do mean FOREVER) to get into. After waiting over an hour we went in the basement there were tons of books. All kinds of books, children's, literature, crafts and lots of really old cooking pamphlets. Like turn of the century old. Right up my alley.
One of the ones I picked up was for Baker's Coconut published in 1919. The entire book has coconut recipes in it. For all kinds of things. I thought these maple coconut rolls sounded so much better than cinnamon rolls. Only problem was the original recipe called for a pie crust like dough that you rolled up and sliced like cinnamon rolls. Taste wise it was fine, but definitely off putting.
I figured you could use a classic cinnamon roll recipe and just change out the filling. I did that earlier today and I have to say that Maple Coconut Rolls definitely rock!! The brown sugar caramelizes into a maple flavor and the coconut is just so unexpected.
While I made a traditional cream cheese frosting for my rolls, I think they'd be even better if you substituted the buttermilk for coconut milk and the vanilla extract for coconut or maple extract. It would definitely kick up the flavor.
For the rolls, I used America's Test Kitchen's recipe. I figured their recipe wouldn't need any tweaking. I did put it in the bread machine though to mix the dough and put it through the first rise. I've found any yeast dough is easiest to make if you put it in the bread machine for the dough cycle.
America's Test Kitchen Basic Sweet Dough Recipe
3/4 cup buttermilk, 110 degrees
6 tablespoons unsalted butter, melted and cooled
3 large eggs
1 1/4 teaspoons salt
4 1/4 cups flour
1/4 cup sugar
1 envelope (2 1/4 teaspoons) instant or rapid rise yeast
I layered everything in the bread machine in this order and put it to work. An hour and a half later I had gorgeous elastic, perfectly risen sweet dough. This recipe makes enough to make a dozen buns or rolls. If you want to make the dough by hand, leave me a comment and I'll include the entire recipe.
Maple Coconut Rolls
2 tablespoons melted butter
1 cup brown sugar
2 cups bakers coconut, sweetened and shredded
Assembly: Take your freshly risen dough and on a floured surface; stretch, pat and pull it till you reach a 12 x 16 inch rectangle. With the 16 inch side being horizontal to you. Brush entire surface with melted butter. Spread brown sugar all over surface of dough, leaving a 3/4 inch area all along the top topping free. You'll need this edge to be able to seal your rolls when you roll them up. Then top with coconut, spreading evenly.
Tightly roll dough up. When finished pinch all along long side to form a seam and seal rolls. When sealed, gently stretch dough to 18 inches in length. Place seam side down and cut into 1 1/2 inch slices with a serrated knife. Place these in a greased 9x13 inch baking pan, cut side down. (I sprinkled any escaping coconut on to the top of the rolls). Cover with plastic wrap and let rise in a warm place till doubled in size. (Mine took about 40 minutes to double, but it was warm out)
When doubled in size, preheat oven to 350 degrees. Bake till puffy and golden brown 20-35 minutes. Mine took 20 minutes on the dot. Remove from oven and allow to cool.
Cream Cheese Frosting
3 tablespoons cream cheese, softened
1 1/2 cups confectioners' sugar
3 tablespoons buttermilk
1/2 teaspoon vanilla
Mix all in a bowl. Spread over warm Maple Coconut Rolls. If you want to kick up the coconut and maple flavors, replace buttermilk with coconut milk and vanilla with coconut or maple extract.
Susie Savors: These rolls were perfect for a light but slightly sinful breakfast. This version is light and fluffy and without the dense feeling of a cinnamon roll. The maple coconut is sweet but the cream cheese frosting cuts back on the sweet just enough. The filling melts in your mouth, not overpowering like some breakfast confections. They did turn out a tad large but the pastry was so airy and plump that two felt like a perfect serving if that's all you planned on eating for breakfast.
Wednesday, July 11, 2012
Wholesome Wednesday: Lemon Clover Rolls
I'm always on the lookout for a quick roll recipe. These lemon clover rolls fit the bill. They mix up quickly and with just a little extra prep, get in the oven fast too. No rising time. Something I always love. The rolls are soft on top, nice and crunchy on the bottom and sides and fluffy inside. A wonderful combination. They also taste slightly lemony. Lemon clover rolls would make a great breakfast treat, snack or something special at dinner. These are amazing fresh from the oven and they disappeared within a few minutes at my house. I'm sure they won't last long at your house either.
I used cold unsalted butter in my rolls because we're out of shortening at the moment. I'm sure it just made the recipe a bit richer. You'll most likely get a flakier roll with shortening. Also if you didn't want a lemon tasting roll, you could substitute buttermilk for the milk and lemon juice. Let's face it, milk and lemon juice sours the milk pretty quickly causing it to curdle. Don't be alarmed by this, your rolls will turn out just fine. If you choose to use buttermilk it does have enough acidity in it to activate the baking soda while the rolls bake.
That's just another example of how I'm likely to alter a recipe while I'm making it. There are always lots ways you can subtly change a recipe to more suit what ingredients you happen to have on hand. This will save you a lot of last minute trips to the store in the future.
Lemon Clover Rolls
2 cups flour
3/4 teaspoon baking soda
1/2 teaspoon salt
1/4 cup sugar
1/3 cup shortening or unsalted butter
1/2 cup whole milk
3 tablespoons fresh lemon juice
Whisk flour, baking soda, sugar and salt in a large bowl. Cut or rub shortening (or butter) into flour mixture until it resembles coarse meal. Add combined milk and lemon juice, stirring quickly to form a soft dough. Turn onto a lightly floured board. Knead slightly, dough will still be sticky. Separate dough into 12 equal portions. Splitting each portion into three, roll these pieces into balls and place in one greased muffin cup. Repeat with remaining 11 portions of dough. Bake in a hot oven, 450 degrees, for 15-20 minutes until lightly golden brown. When out of the oven, brush tops of rolls with cream. Makes 12 rolls.
Wednesday, June 6, 2012
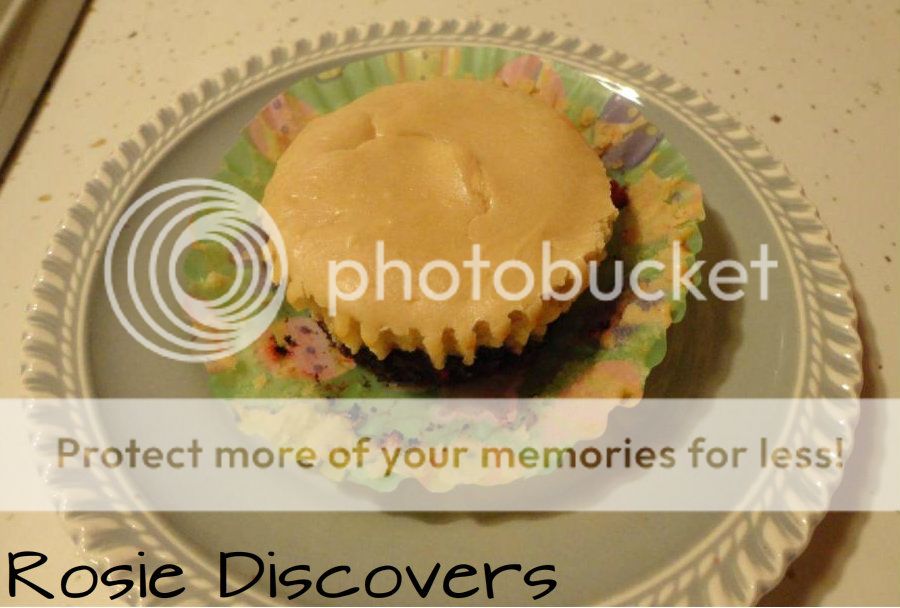
Wholesome Wednesday: Black Bottom Peanut Butter Cheesecakes
Recently, I saw these Individual Peanut Butter Cheesecakes and thought they'd be so much better with a chocolate crust. I always want to pair peanut butter up with chocolate. In my mind they always go together. :)
So the only difference in this recipe is the crust. I also halved the recipe. Twelve cheesecakes seemed like a lot to me, when I only wanted a simple quick dessert. Although next time I'm thinking less sugar and some honey in the cheesecake part too. Another great addition would be either a chocolate ganache or a thick caramel on top of the crust.
Black Bottom Peanut Butter Cheesecakes
Crust:
3/4 cup Oreo cookie crumbs (or your fave chocolate cookie)
1 tablespoon sugar
2 tablespoons unsalted butter, melted
Filling:
1 (8oz) package 1/3 less fat cream cheese, softened
1/2 cup sugar
1/2 teaspoon vanilla
1/4 cup creamy peanut butter
1 1/2 tablespoons flour
1 egg
Preheat oven to 350 degrees. Line a 12 count muffin tin with 6 liners.
In a medium bowl, mix together crust ingredients till combined. Using a tablespoon, scoop a heaping tablespoon into the bottom of each cup. Use the back of a spoon to press the crust down and also up the sides. Set aside.
In a mixing bowl, beat cream cheese and sugar till smooth. Add vanilla and peanut butter. Beat again until smooth. Add flour; mix till smooth. Then add egg and beat till smooth.
Scoop filling into cups, lightly smoothing tops. Bake for 20 minutes or until centers are set. If worried about cracking, add another pan with water to a lower oven shelf. Cool to room temperature. Refrigerate or serve warm.
Wednesday, May 30, 2012
Wholesome Wednesday: Swirly Jell-O Cookies+My Family's Sugar Cookie Recipe
Today's recipe is something I've been making for many, many years. My mom has been making this sugar cookie recipe since before I was born. Both turn out excellent every single time. They are so easy to make, you don't even need a kitchen-aid or a mixer. Just a bowl and a spoon. :)
My Jell-O cookie recipe is healthier than the ones I've seen lately online. It calls for a lot less butter and sugar while you still get amazing color and flavor. And if you want to make the color truly pop, just add some gel food coloring.
This recipe is a little different in that I've rolled the sugar cookie and Jell-O doughs together to create beautiful bright swirled cookies. They're absolutely gorgeous and even though the Jell-O dough is mixed with sugar cookie dough it doesn't detract from their flavor. You can use any flavor of Jell-O in these cookies and even sugar free Jell-O if you want. I've used my faves which are strawberry and berry blue. I hope your family loves this recipe as much as we do.
This recipe originally came from Betty Crocker's 110 Cookie Recipes published in August, 1990. It was also called Crisp Pastel Cookies probably due to the fact that Jell-O is a brand name. We've always called them Jell-O cookies though. :)
The only thing I've changed is to halve the recipe and add a 3 ounce package of Jell-O to each half to increase the color and flavor in the dough.
Jell-O Cookies
1/2 cup sugar
1/2 cup shortening
1/4 cup unsalted butter, softened
1 teaspoon vanilla
2 eggs
1 package (3 ounces) any fruit-flavored gelatin
2 1/2 cups all purpose flour
1 teaspoon baking powder
1/4 teaspoon salt.
Heat oven to 400 degrees (for swirl cookies 375). Mix sugar, shortening, butter, vanilla, eggs and gelatin (dry). Stir in flour, baking powder and salt.
Use a tablespoon cookie scoop to scoop dough out on to trays. Place 3 inches apart on the ungreased cookie sheets. Flatten with the bottom of a glass dipped in sugar. Bake 6-8 minutes. Makes about 5 dozen cookies.
Christmas Cookie Cut-ups
3 cups flour
1/2 teaspoon baking soda
1/2 teaspoon baking powder
1/2 teaspoon salt
2 sticks unsalted butter, either room temp or cold
2 eggs
1 cup sugar
1 teaspoon vanilla
Put all dry ingredients in a large bowl, except the sugar. Cut butter into this mixture with a pastry cutter until it resembles fine meal. Beat eggs with sugar and vanilla until well blended. Add to flour mixture and stir until dough forms a ball. Wrap in plastic wrap and chill until firm. Roll out on a floured surface and cut with cookie cutters. Place on an ungreased cookie sheet and bake at 375 degrees for 6-8 minutes.
Swirl Cookies
1 recipe Jell-O cookies, chilled
1 recipe Christmas Cookie Cut-ups, chilled
Roll out doughs one at a time between 2 pieces of waxed paper. I rolled mine 8x11 inches and about 1/4 inch thick. Place doughs in freezer for at least 30 minutes or until cold enough to remove waxed paper without dough sticking. Set Jell-O dough on top of sugar cookie dough and start rolling up the dough on the longest side. Continue to roll tightly, fixing any tears in the sugar cookie dough while rolling. Wrap rolls in plastic wrap and place back in freezer for at least 30 minutes or until cold enough to slice without warping rolls.
Slice cookies 1/4 inch thick and place on baking racks 12 to a rack and bake at 375 degrees for 6-8 minutes.
Wednesday, May 9, 2012
Wholesome Wednesday: Microbaked Apple
Today's Wholesome Wednesday
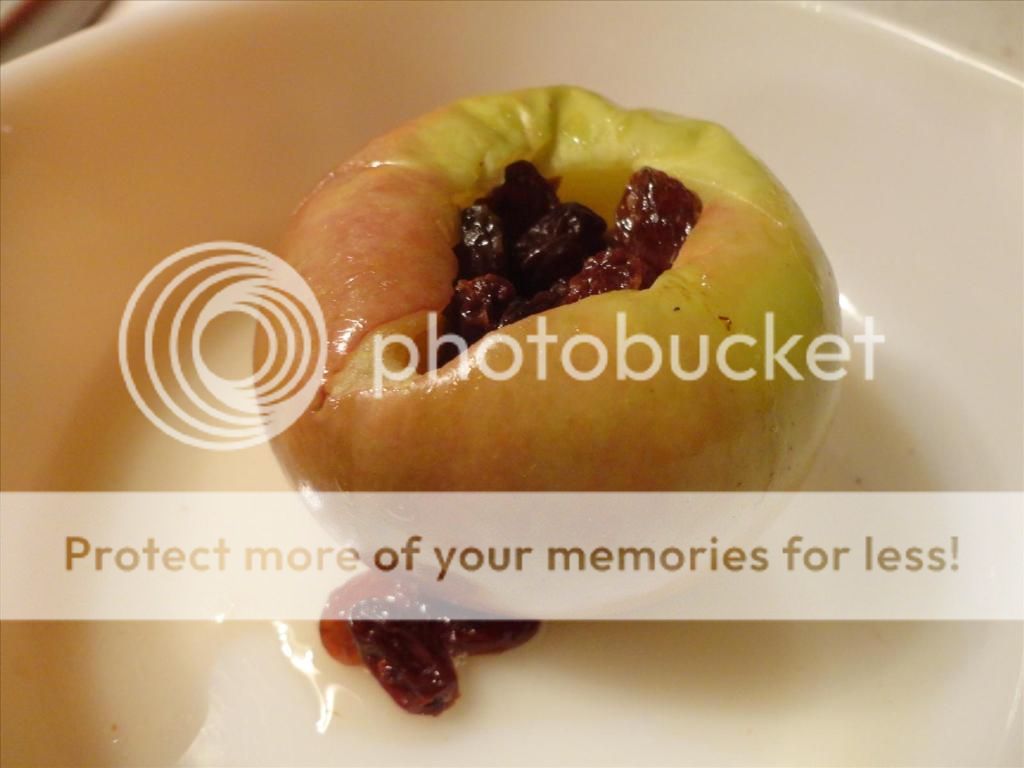
Micro baked Apple
Microwave a small cored apple (depending on how thick the peel is you might want to peel them too). Fill the hole with 1 tablespoon of raisins and microwave until tender, 3-5 minutes. Mine took about 2 1/2 minutes. So do keep an eye on it. Top with 1/2 cup low fat vanilla ice cream.
So the recipe couldn't be simpler. And it tastes amazing. Kinda like a hot apple pie without the crust. I definitely recommend trying it out. :)
As soon as I finish the recipe I've been playing with I'll post some photos, but you'll have to wait till next Wednesday to get all the details.
Monday, May 7, 2012
Cookies For Rookies-The Looneyspoons Collection
Since I love cooking and baking I go through a lot of cookbooks. The most recent one I had was The Looneyspoons Collection by Janet & Greta Podleski. I'd seen one of their cookbooks before about a decade ago, when I lived in Seattle. And the cookbooks are really cute. They're illustrated, with pictures on almost every single page and have a lot of nutritional information in them.
As you might have noticed, here at Rosie Discovers, we're suckers for anything with peanut butter and chocolate in them. And I do mean anything. So it was a no-brainer to try out the Cookies for Rookies recipe. I quite like this recipe because it makes a more moist cookie than the other oatmeal peanut butter chocolate chip cookie recipe that we love. It reminds me more of a soft peanut butter cookie. It even has the cute fork marks on top. There are only two things I changed in the recipe. First, I used a peanut butter with honey already in it (which I absolutely love!!). Second, I made my cookies smaller. A 1 1/2 inch cookie is a little big for me, so I used a tablespoon cookie scoop to make mine. If you make a smaller cookie, you should get about 3 1/2 dozen out of the recipe and you'll also have to adjust the cooking time to about 7 minutes.
Cookies For Rookies
1 1/4 cups flour
1 cup oats
1/2 teaspoon baking soda
1/2 teaspoon salt
3/4 cup packed brown sugar
1/3 cup unsalted butter at room temperature
1/3 cup peanut butter
1 egg
1/3 cup mini chocolate chips
Preheat oven to 350 degrees.
Using a mixer, beat together brown sugar, butter, peanut butter and egg on low speed till well blended. Add dry and chocolate chips and mix well.
Using a cookie scoop, scoop out dough 2 inches apart onto greased or lined cookie sheets. Flatten with a fork to 1/4 inch thickness. Bake about 7 minutes. Watch to make sure cookies don't dry out and over bake.
To me this is the perfect cookie size. This way you can have more than one, because you'll definitely want too.
Wednesday, April 4, 2012
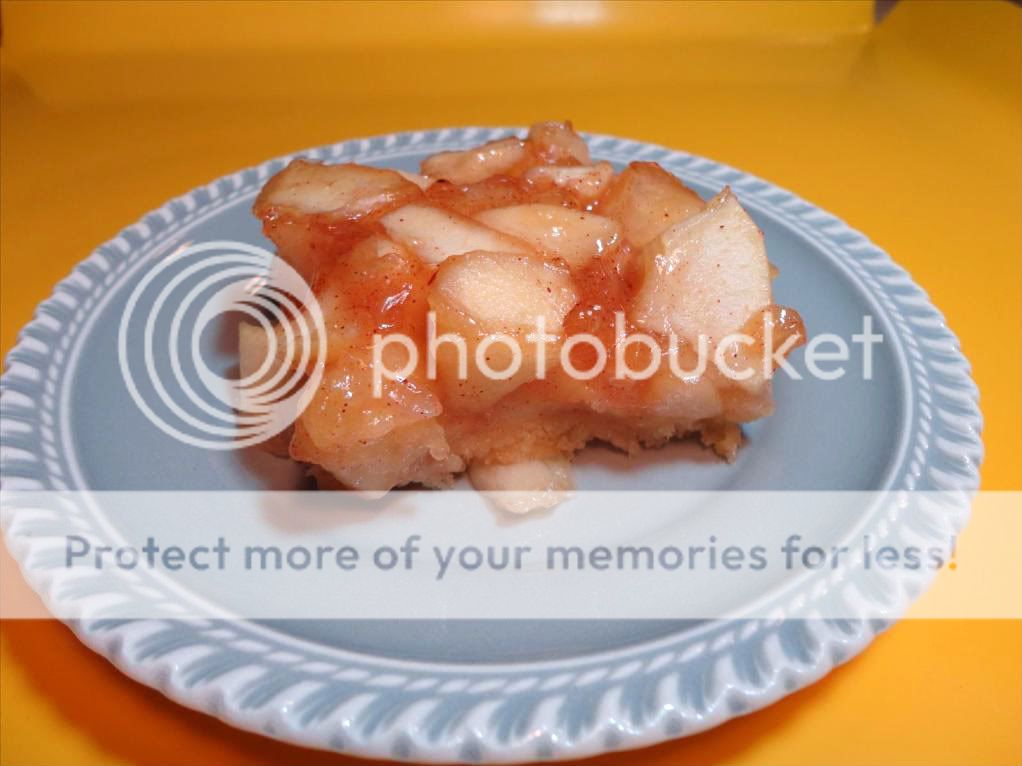
Wholesome Wednesday: Apple Pie Coffee Cake
I absolutely love any baked goods with fresh fruit in them. And apples are a big favorite. A definite no-brainer to alter this old coffee cake recipe to include apples instead of blueberries. I mean what could be better than coffee cake and apple pie for breakfast? Unless there's chocolate thrown in there somewhere I don't think it could be better. :)
Apple Pie Coffee Cake
4-5 medium to large sweet tart apples, peeled, cored and coarsely diced
5 tablespoons sugar
1/4 teaspoon cinnamon
2 teaspoons cornstarch
2 tablespoons lemon juice
1/4 cup unsalted butter, room temperature
1/4 cup sugar
1 egg, well beaten
1/2 teaspoon vanilla
1 cup flour
1 1/2 teaspoons baking powder
1/4 teaspoon salt
1/4 cup milk
First, make the apple pie topping. I typically have baking apples (granny smith, gala, rome, jonagold, jonathan, mcintosh) in the fridge and use a variety. They've all worked great just make sure they are sweet, tart and crisp. To prepare topping, in a large skillet combine the apples, sugar and cinnamon. Cook over medium heat, stirring occasionally, for 5-7 minutes, until apples are tender, but still firm. In a small cup, whisk together cornstarch and lemon juice. Add to apple mixture and continue cooking, stirring occasionally until thickened. Remove from heat and set aside to cool.
Second, mix the dough. Using a mixer, cream together butter and sugar till light and fluffy. Add the egg and vanilla, mix. Mix dry ingredients in a separate bowl, then add alternately with milk. Beat batter until smooth and spread in a greased 8x8 inch square baking pan. Carefully spoon cooled apple topping over batter being careful not to press to hard when spreading. If you push too hard the batter will be thin in the middle and thicker on the edges. It will still bake fine and taste amazing but might look a little off.
Bake at 350 degrees for 30 minutes. Use a toothpick to test. Serve while still warm.
Subscribe to:
Posts (Atom)